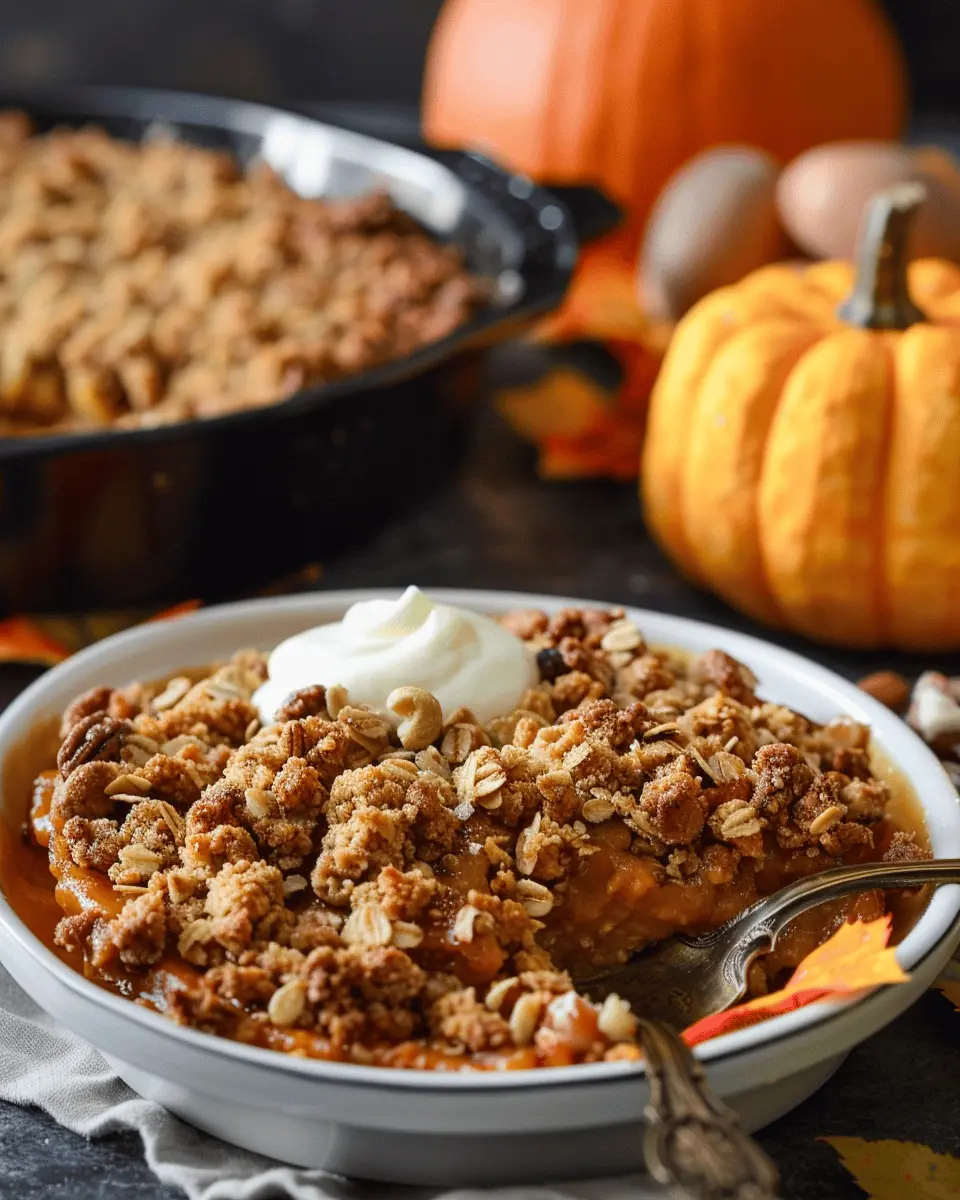
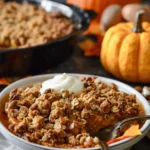
Introduction to Pumpkin Crisp
Fall is a season synonymous with cozy sweaters, colorful leaves, and the unmistakable aroma of pumpkins wafting through the air. Among the plethora of seasonal treats, pumpkin crisp stands out as a beloved dessert that perfectly captures the essence of autumn. Whether you’re hosting a dinner party or simply enjoying a quiet evening at home, this delightful dish will satisfy your sweet tooth while warming your heart.
Why Pumpkin Crisp is the Perfect Fall Dessert
You might wonder what makes pumpkin crisp such an essential addition to your fall festivities. Let’s dive into some of its delightful characteristics:
-
Comforting Flavor: With a blend of warm spices like cinnamon, nutmeg, and ginger, each bite of pumpkin crisp transports you to a pumpkin patch on a crisp autumn day. The rich, creamy pumpkin filling, paired with a crumbly topping, creates a harmonious symphony of flavors that is both satisfying and comforting.
-
Simple and Versatile: One of the best things about this dessert is its simplicity. Made with a few pantry staples—like pumpkin puree and oats—it’s an accessible treat anyone can whip up. Plus, it can easily be modified to suit various dietary preferences. For instance, you could use almond flour for a gluten-free version or add nuts for an extra crunch.
-
Sharing Opportunities: There’s something magical about sharing food, especially during the fall. A warm dish of pumpkin crisp is perfect for gatherings, whether it’s a family Thanksgiving or a casual get-together with friends. Your guests will appreciate the homemade goodness, and it pairs perfectly with a scoop of vanilla ice cream or a dollop of whipped cream.
Make sure to check out this article on the nutritional benefits of pumpkin if you’re looking to boost your health while enjoying this delicious treat!
As you embark on your autumn baking adventures, let pumpkin crisp be your go-to dessert. Not only is it easy to prepare, but it embodies the warmth and nostalgia of the season—oh, and did I mention it makes your kitchen smell heavenly?

Ingredients for Pumpkin Crisp
Creating a delicious pumpkin crisp starts with selecting the right ingredients. Here’s what you’ll need for each delectable layer of this comforting dessert!
Essential Ingredients for the Pumpkin Pie Layer
The rich, flavorful base of your pumpkin crisp comes down to a few vital components:
- Canned Pumpkin: Opt for pure pumpkin puree, not the spiced pie filling, for control over flavors.
- Sugar: Granulated sugar works perfectly to sweeten the filling.
- Eggs: You’ll need a couple to help bind the mixture together.
- Spices: A blend of cinnamon, nutmeg, and ginger will create that classic autumn flavor.
- Evaporated Milk: This adds creaminess and richness to the filling.
Check out The Pumpkin Pie Council for more tips on using pumpkin in baking!
Key Components of the Cinnamon Streusel
Don’t forget the heavenly cinnamon streusel that tops off your pumpkin crisp:
- Oats: Rolled oats give the streusel a chewy texture.
- Flour: All-purpose flour helps create that crumbly texture.
- Brown Sugar: For a deeper, caramel-like sweetness.
- Cinnamon: Essential for flavor, adding warmth and coziness.
- Butter: Melted and combined, it binds the ingredients and adds richness.
Combine these ingredients for a crunchy topping that perfectly complements the smooth pumpkin layer. Your taste buds are in for a treat!
Preparing Pumpkin Crisp
Making a delicious pumpkin crisp is surprisingly simple and rewarding! Follow these steps, and you’ll have a warm, comforting dessert perfect for gatherings, chilly evenings, or just satisfying that fall cravings. Let’s dive in!
Preheat the oven and prepare your baking dish
First things first, preheating your oven is essential for achieving the perfect texture. Set it to 350°F (175°C). While your oven heats up, grab an 8×8-inch or a 9×13-inch baking dish. Lightly grease it with butter or cooking spray to ensure that your pumpkin crisp doesn’t stick. A well-prepped dish will lead to easy serving—and who wants to wrestle with dessert when it’s time to dig in?
Whisk together the pumpkin pie filling
Next, let’s focus on the pumpkin filling, which is the heart of your dish. In a medium bowl, combine:
- One 15-ounce can of pure pumpkin
- Three-quarters of a cup of sugar
- One-third of a cup of evaporated milk (or any milk substitute like almond or oat milk)
- Two large eggs
- A teaspoon of vanilla extract
- A teaspoon of pumpkin pie spice (this is where the pumpkin magic happens)
Whisk these ingredients together until they’re smooth and well-blended. The result should be a creamy, vibrant mixture that will be the base of your pumpkin crisp. This filling is not only rich but also packed with vitamins like A and C, making it a guilt-free indulgence. For more details on the benefits of pumpkin, check out this Nutritional Information.
Mix the cinnamon streusel topping
Now comes the part that really elevates your pumpkin crisp: the cinnamon streusel topping. It’s the perfect combination of sweet and crunchy! In a separate bowl, mix:
- One cup of all-purpose flour
- One cup of rolled oats
- Three-quarters of a cup of brown sugar
- A teaspoon of cinnamon
- Half a cup of melted butter
You’ll want to stir these ingredients until combined. The topping should have a crumbly consistency. If you find yourself snacking on the topping before it even makes it to the oven, you’re not alone. This mixture is practically irresistible!
Assemble the layers in the dish
Once your filling and topping are ready, it’s time to assemble your pumpkin crisp. Pour the pumpkin filling into your greased baking dish and spread it evenly. Then, take your streusel topping and sprinkle it generously over the filling. Make sure to coat the entire surface for those delightful crunchy bits in every bite!
Bake until golden brown and set
Now, pop your baking dish into the preheated oven and let it bake for about 40-45 minutes. You’ll know it’s done when the edges begin to bubble and the topping turns golden brown. You can give it a light shake—if the center jiggles slightly, it’s likely set! After removing it from the oven, let your pumpkin crisp cool for a few minutes before diving in.
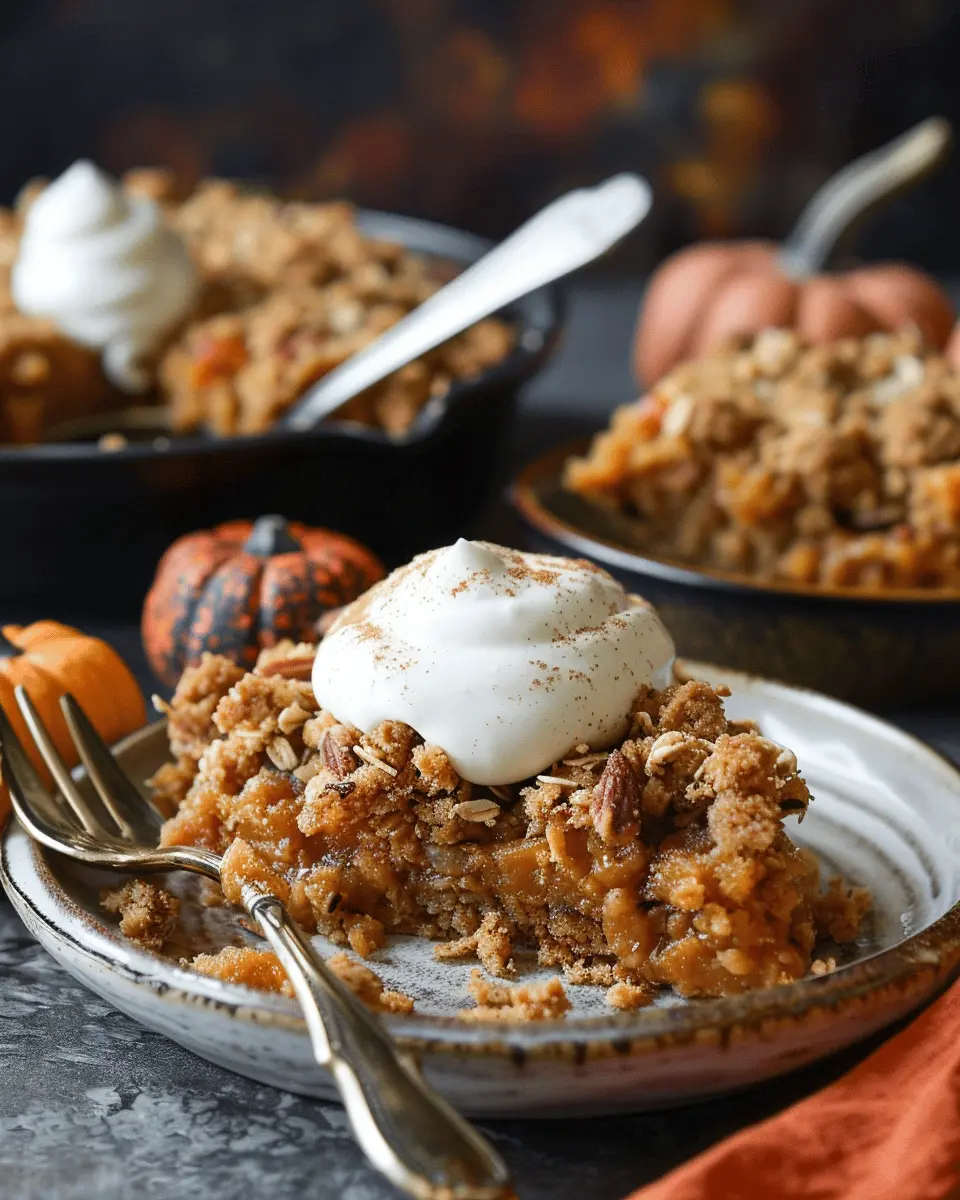
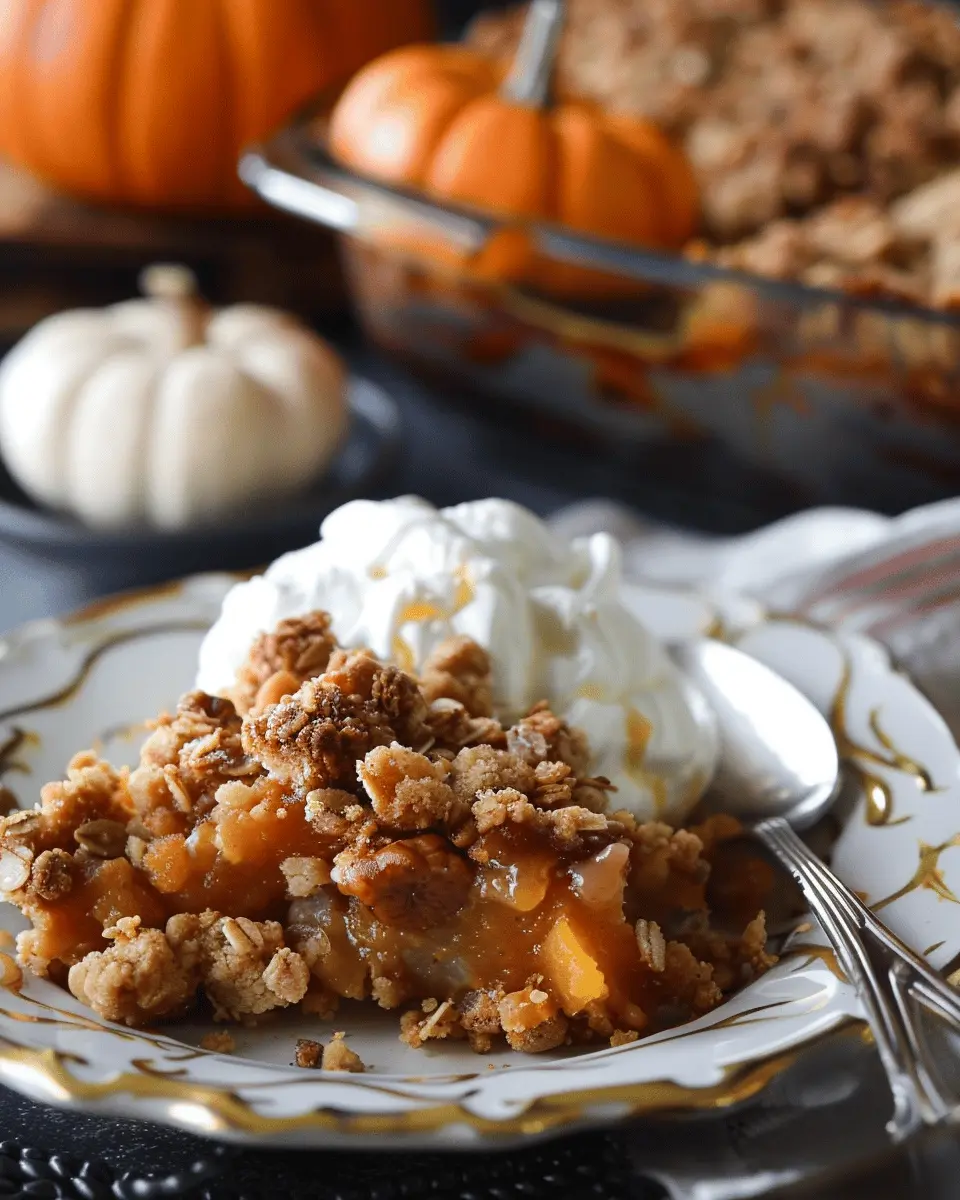
The aroma that fills your kitchen is nothing short of heavenly. If patience is a virtue, then let it cool a bit longer to allow those flavors to meld. Serve warm with a dollop of whipped cream or a scoop of vanilla ice cream for an extra treat.
Now, all that’s left is to enjoy your freshly baked pumpkin crisp. It’s sure to be a hit! What’s your favorite way to enjoy pumpkin-themed treats? Share your thoughts in the comments below!
Variations on Pumpkin Crisp
When it comes to pumpkin crisp, the deliciousness can easily be tailored to suit dietary preferences without sacrificing flavor. Here are two fantastic variations to add to your fall recipe repertoire!
Gluten-Free Pumpkin Crisp
If you or someone you know is navigating a gluten intolerance, fear not! You can still indulge in a magnificent pumpkin crisp. Simply swap out the regular flour for a high-quality gluten-free blend, or try almond flour for a nutty flavor. Here’s what you can do:
- Crust: Use almond flour or a gluten-free oat flour as a base.
- Topping: Combine gluten-free oats with melted coconut oil and brown sugar for that perfect crisp texture.
Gluten-free doesn’t mean sacrificing taste. In fact, many say it tastes even better! Check out this resource for more gluten-free baking tips.
Vegan Pumpkin Crisp
For those embracing a plant-based diet, creating a vegan pumpkin crisp is a breeze. By making some simple ingredient swaps, you’ll have a comforting dessert that everyone can enjoy. Here’s how:
- Filling: Replace traditional eggs with flaxseed meal mixed with water (1 tablespoon of flaxseed meal + 2.5 tablespoons of water = 1 egg).
- Topping: Use coconut oil or a vegan butter alternative instead of dairy butter in the crisp topping.
The result? A delightful pumpkin crisp that’s equally indulgent, creamy, and utterly satisfying! For inspiration, you may look into the health benefits of pumpkin over at Healthline.
These variations make it easy to enjoy the classic comfort of pumpkin crisp, no matter your dietary needs. Happy baking!
Cooking Tips and Notes for Pumpkin Crisp
Storing Leftovers and Reheating Advice
Once you’ve savored your delicious pumpkin crisp, you might find that you have some leftovers. Store them in an airtight container in the fridge, where they’ll stay fresh for up to four days. When it’s time to enjoy another serving, reheating is a breeze! Simply pop it in the oven at 350°F for about 15 minutes. If you’re short on time, a quick 1-2 minutes in the microwave works too, just watch that you don’t overdo it, or the crisp may lose its texture.
Make-Ahead Options for Busy Days
Want to have your pumpkin crisp ready to go? Prep the dish a day in advance! You can mix the pumpkin filling and assemble the crisp topping beforehand; just keep them separate until baking. This way, on a busy day, you can throw it in the oven with little fuss. For freezing, wrap individual portions tightly, and they’ll keep for up to three months. When you’re ready to dig in, thaw overnight in the fridge and reheat as mentioned above.
Feeling inspired? Check out more on meal prep ideas at The Spruce Eats!
Serving Suggestions for Pumpkin Crisp
When it comes to enjoying your delightful pumpkin crisp, there are plenty of serving options that can elevate your dessert experience!
Pairing with Ice Cream and Whipped Cream
There’s nothing quite like a warm pumpkin crisp topped with a scoop of vanilla ice cream! The cold cream melts into the warm dish, creating a heavenly blend of flavors and textures. If you’re feeling fancy, a dollop of freshly whipped cream can add a light, airy touch. Consider sprinkling some cinnamon or nutmeg on top for that extra burst of flavor.
Serving Warm versus Cold
Did you know that serving temperature can influence your dessert’s taste? While many love enjoying pumpkin crisp warm straight from the oven, it can also be delicious when served cold. When chilled, the flavors settle into a creamy, rich treat that’s perfect for a warm fall day. Experiment with both to find your favorite way to enjoy this seasonal delight!
For more dessert inspiration, check out sources like Food Network or Bon Appétit for creative ideas!
Time Breakdown for Pumpkin Crisp
Preparation Time
The preparation time for your delicious pumpkin crisp is about 15 minutes. This is when you’ll gather all your ingredients and mix them together. Pro tip: Having everything measured out in advance can streamline the process. It’s a great way to kickstart a cozy evening of baking!
Baking Time
Once you’ve prepared your pumpkin mixture and crumb topping, the baking time is around 45 minutes. You’ll want to keep an eye on it as it bakes to ensure that perfect golden-brown crust forms on top.
Total Time
In total, you’ll be looking at about 1 hour for this comforting dessert. The best part? This time spent baking is not just for making a treat; it’s also about creating wonderful aromas that fill your home, inviting everyone to the kitchen!
By the way, if you’re curious about dish variety, check out sites like Food Network and AllRecipes for more pumpkin-inspired recipes.
Nutritional Facts for Pumpkin Crisp
Calories per serving
When indulging in a warm serving of pumpkin crisp, you can expect about 200 calories. This makes it a delightful yet guilt-free treat, perfect for those cozy autumn evenings. The beauty of this dessert lies in its ability to satisfy your sweet cravings without overwhelming your daily caloric intake.
Key nutritional components
The pumpkin crisp is not only delicious but also packs a punch in the nutrition department. Here’s what you can look forward to in each serving:
- Fiber: Contains about 3 grams, aiding in digestion and promoting satiety.
- Protein: Offers approximately 4 grams, thanks to ingredients like oats and pumpkin.
- Vitamins: Rich in Vitamin A and C, providing essential antioxidants to boost your immunity.
- Healthy fats: Includes healthy fats from nuts and seeds, supporting overall heart health.
For an even deeper dive into nutrition specifics, check out resources like the USDA FoodData Central, which can give you comprehensive insights into individual ingredients.
This pumpkin crisp is not just another dessert; it brings together wholesome ingredients that not only indulge your taste buds but also serve your body right. So, why not feel good about enjoying dessert? It’s a little autumn celebration in every bite!
FAQs about Pumpkin Crisp
Can I use fresh pumpkin instead of canned?
Absolutely! Using fresh pumpkin in your pumpkin crisp can elevate the dish with a fresh, vibrant taste. If you decide to go with fresh pumpkin, make sure to roast it first. Cut the pumpkin in half, scoop out the seeds, and roast it at about 400°F (200°C) for about 30-40 minutes until tender. After that, just scoop out the flesh and mash it up. Just remember that fresh pumpkin can have a different moisture level than canned, so you might need to adjust your other ingredients slightly.
What other toppings can I use with Pumpkin Crisp?
While the classic topping for pumpkin crisp is usually an oat and brown sugar crumble, don’t hesitate to get creative! Consider these tasty alternatives:
- Nuts: Add chopped pecans or walnuts for a crunchy texture.
- Coconut: Shredded coconut brings a tropical flair.
- Chocolate chips: Dive into decadence with some semi-sweet or dark chocolate.
- Ice cream or whipped cream: Nothing beats a warm slice topped with a scoop of vanilla ice cream or a dollop of whipped cream!
How long can I store Pumpkin Crisp in the fridge?
You can keep your delicious pumpkin crisp in the fridge for about 3 to 5 days. Make sure to cover it well, either with plastic wrap or aluminum foil, to maintain freshness. If you want to enjoy it later, consider freezing it. Just ensure it’s fully cooled, then wrap it tightly. When you’re ready for a treat, thaw it overnight in the fridge and reheat before serving.
For more tips on baking with pumpkin, check out resources like the Pumpkin Farmers of America. Happy baking, and enjoy your pumpkin crisp!
Conclusion on Pumpkin Crisp
Why you need this recipe in your fall baking rotation
If you’re looking for a cozy addition to your fall baking lineup, Pumpkin Crisp is a must-try. This delightful dessert perfectly blends the warmth of fall spices with the natural sweetness of pumpkin, creating a treat that’s both comforting and satisfying. Whether you’re entertaining friends or enjoying a quiet evening at home, this recipe is sure to impress.
Here’s why you’ll love it:
- Simple Ingredients: Most of the components are pantry staples, making it easy to whip up anytime.
- Versatility: Serve it warm with a scoop of vanilla ice cream or enjoy it chilled for breakfast.
- Crowd-pleaser: This dessert is great for gatherings, ensuring no one leaves without raving about it.
So, put this Pumpkin Crisp in your rotation! Your taste buds will thank you, and autumn will feel all the cozier. For more fall dessert options, consider checking out Food Network or Bon Appétit. Happy baking!
PrintPumpkin Crisp: The Best Cozy Dessert for Fall Gatherings
This Pumpkin Crisp is the ultimate fall dessert, perfect for cozy gatherings. With a warm spiced pumpkin filling and a crunchy topping, it’s sure to please your guests.
- Prep Time: 15 minutes
- Cook Time: 35 minutes
- Total Time: 50 minutes
- Yield: 12 servings 1x
- Category: Dessert
- Method: Baking
- Cuisine: American
- Diet: Vegetarian
Ingredients
- 1 can (15 oz) pumpkin puree
- 1 cup sugar
- 1 teaspoon ground cinnamon
- ½ teaspoon ground nutmeg
- ½ teaspoon ground ginger
- 1 teaspoon vanilla extract
- 3 large eggs
- 1 cup all-purpose flour
- 1 cup rolled oats
- 1 cup brown sugar
- ½ cup unsalted butter, melted
- 1 teaspoon baking powder
- ½ teaspoon salt
Instructions
- Preheat the oven to 350°F (175°C).
- In a large bowl, mix together pumpkin puree, sugar, cinnamon, nutmeg, ginger, vanilla extract, and eggs until smooth.
- In another bowl, combine flour, oats, brown sugar, baking powder, and salt. Stir in the melted butter until crumbly.
- Spread the pumpkin mixture into a greased 9×13 inch baking dish.
- Evenly sprinkle the topping over the pumpkin mixture.
- Bake for 30-35 minutes until the topping is golden brown.
- Let cool before serving.
Notes
- Serve warm with whipped cream or vanilla ice cream for an extra treat.
- Adjust spices according to your taste preferences.
Nutrition
- Serving Size: 1 slice
- Calories: 250
- Sugar: 18g
- Sodium: 150mg
- Fat: 10g
- Saturated Fat: 5g
- Unsaturated Fat: 3g
- Trans Fat: 0g
- Carbohydrates: 35g
- Fiber: 3g
- Protein: 3g
- Cholesterol: 50mg
Keywords: Pumpkin Crisp, Cozy Dessert, Fall Dessert