Introduction to Oreo Peanut Butter Bars
When it comes to satisfying your sweet tooth, few treats can compete with Oreo Peanut Butter Bars. These delicious desserts are an exciting fusion of flavors that are sure to become a staple in your kitchen. But what exactly makes these bars so irresistible?
What makes Oreo Peanut Butter Bars irresistible?
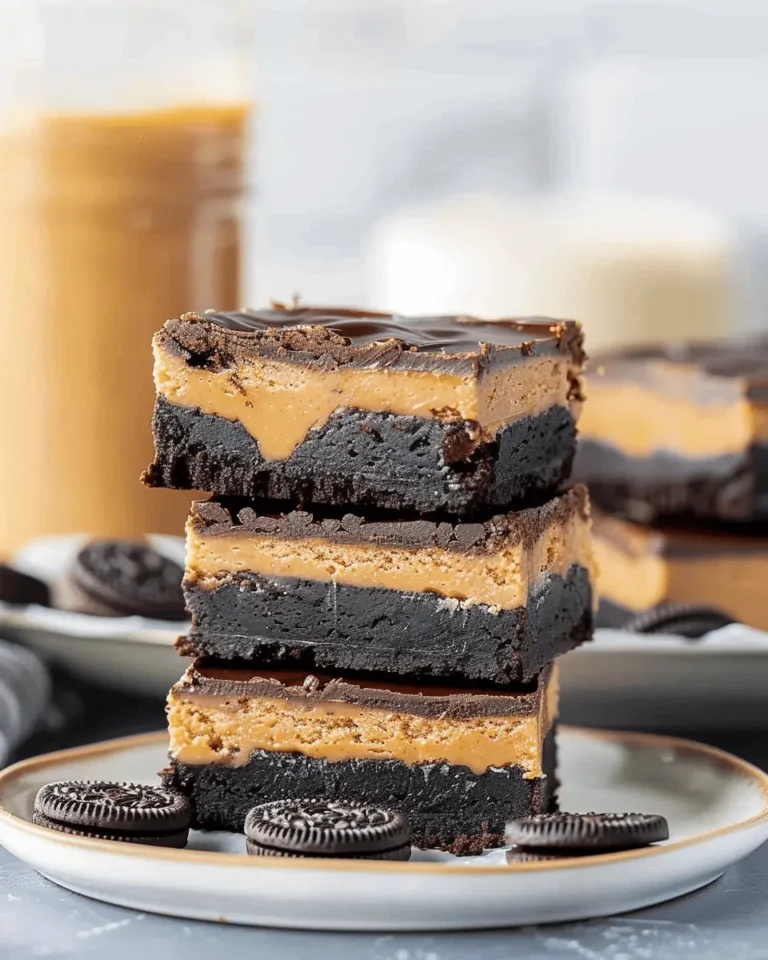
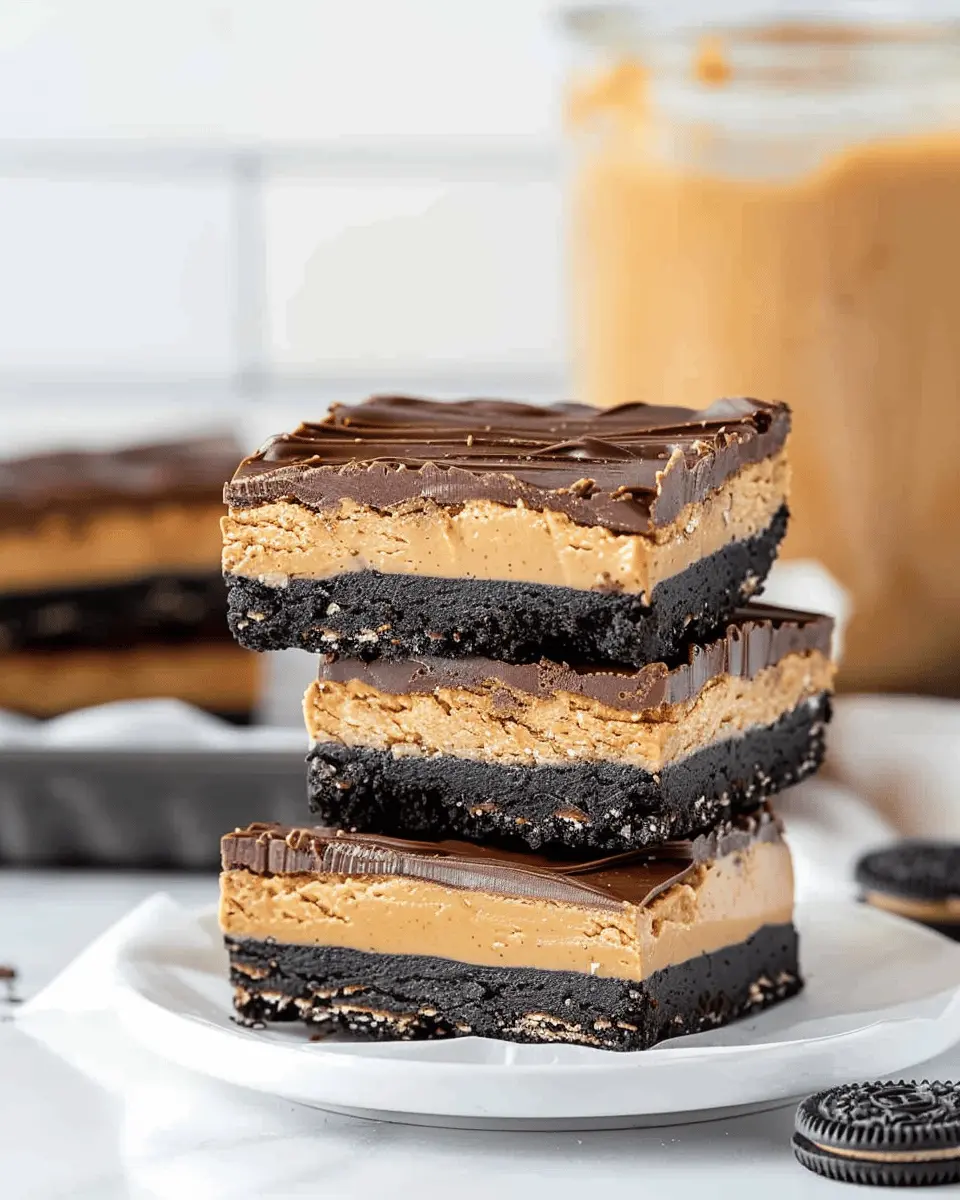
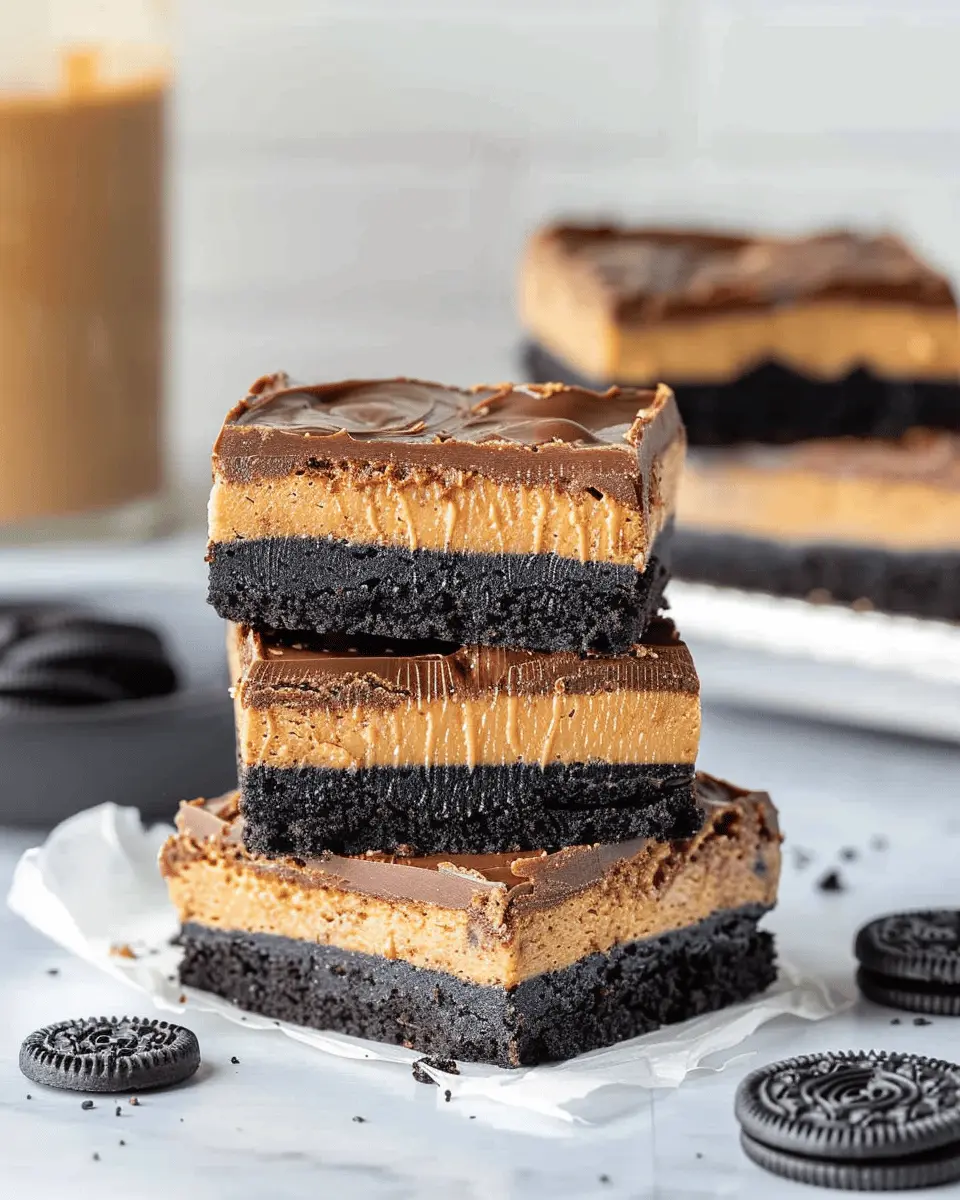
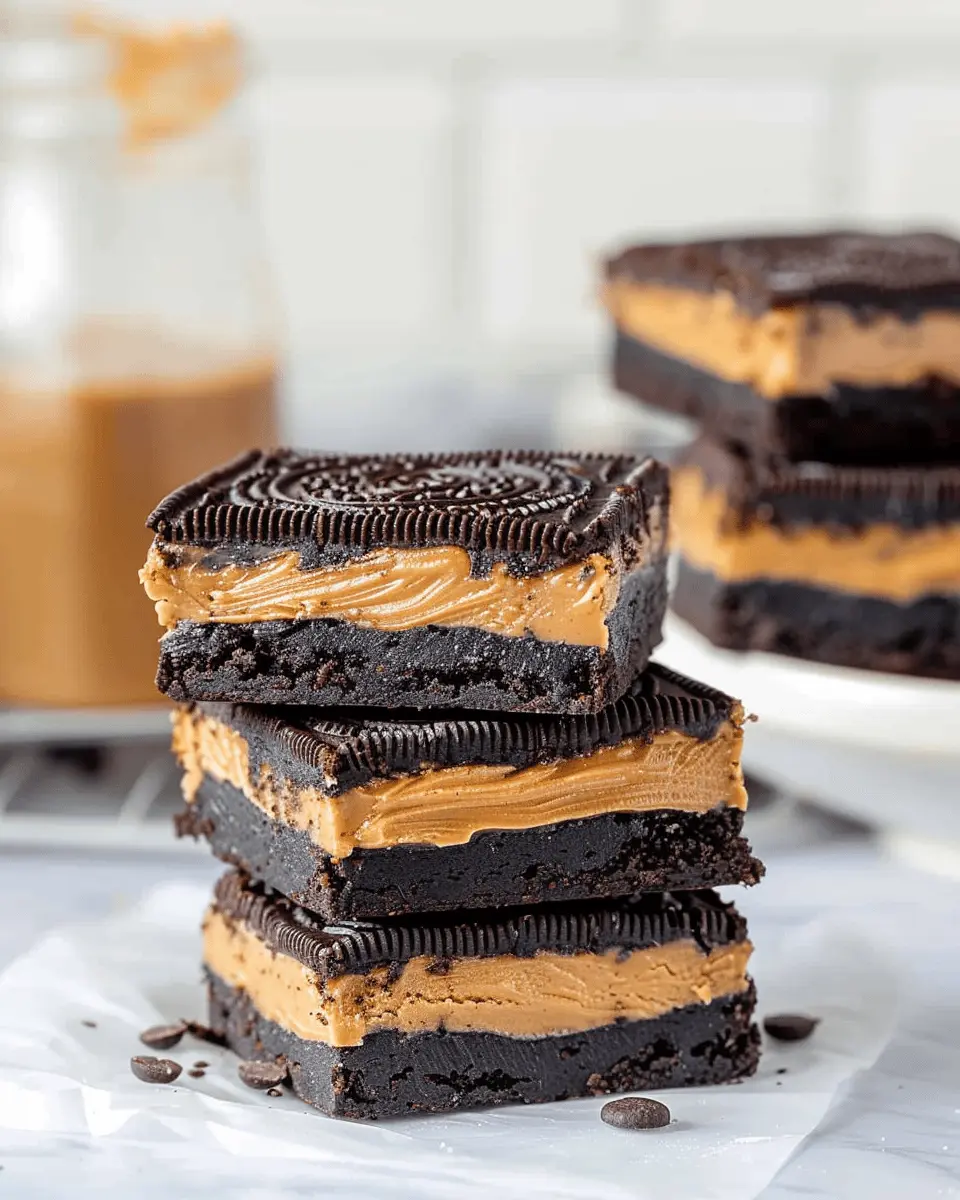
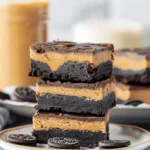
First and foremost, the combination of rich, creamy peanut butter with luscious Oreo cookies creates a perfect harmony of tastes and textures. Picture this: a crunchy base made from crushed Oreos topped with a velvety layer of peanut butter goodness. That classic rich flavor, paired with the nostalgic taste of Oreos, appeals to both young adults and the inner child in all of us.
Moreover, these bars are easy to prepare — no baking required! This makes them an ideal choice for a quick indulgence or an impressive dessert for gatherings. Imagine inviting friends over and surprising them with a pan of these delectable treats. You’ll be the star of the evening, and you won’t even break a sweat in the kitchen.
It’s worth noting that calorie-dense treats like these can be enjoyed in moderation as part of a balanced lifestyle. According to recent studies, allowing yourself the occasional guilt-free treat can actually enhance overall enjoyment of your eating experience source. Every bite of Oreo Peanut Butter Bars is an excellent way to celebrate life’s little moments.
Additionally, these bars lend themselves wonderfully to customization. You can add toppings like crushed nuts, chocolate drizzles, or even a sprinkle of sea salt, ensuring every batch can be uniquely yours.
So whether you’re winding down after a long workweek or looking to treat yourself during a cozy movie night, Oreo Peanut Butter Bars are a go-to recipe that blends simplicity with scrumptiousness. Let’s dive into the recipe and get started on creating these delightful squares that are bound to become your new favorite.
Curious about other desserts? Check out more mouthwatering recipes here.
Ingredients for Oreo Peanut Butter Bars
When it comes to whipping up a batch of Oreo Peanut Butter Bars, the right ingredients can elevate your dessert game. Let’s break down the essentials and a few fun optional add-ins that can take these bars to the next level.
Essential ingredients list
To create these indulgent bars, you’ll need:
- Oreo cookies: The star of this recipe! A mix of the classic flavor adds that delectable crunch.
- Peanut butter: Smooth or crunchy, your choice! It brings that rich, nutty flavor.
- Butter: Unsalted works best. It helps bind everything together.
- Sweetener: Granulated sugar is a common choice, but brown sugar can add extra depth.
- Chocolate chips: Semi-sweet or dark for a lovely melty finish.
Optional ingredients for customization
Feeling a bit adventurous? Consider adding:
- Sea salt: A sprinkle on top for a sweet and salty vibe.
- Dark chocolate drizzle: Elevates the presentation and taste.
- Coconut flakes: For those who enjoy a tropical twist.
- Nuts: Chopped almonds or walnuts can add an exciting crunch.
With these ingredient options, you can tailor your Oreo Peanut Butter Bars to fit any palate or occasion. Happy baking! For more tips on customizing your dessert recipes, check out resources from Serious Eats and Bon Appétit.
Step-by-step preparation of Oreo Peanut Butter Bars
Oreo Peanut Butter Bars are an indulgent treat that perfectly marries the beloved flavors of chocolate cookies and creamy peanut butter. This no-bake dessert is a game-changer whether you’re hosting friends, looking for a sweet snack, or needing a quick office treat. Let’s dive into the step-by-step preparation of these mouthwatering bars.
Gather your materials
First things first – let’s get organized! You’ll need a few key ingredients and tools to create these decadent Oreo Peanut Butter Bars. Here’s your shopping list:
Ingredients:
- 24 Oreos (or any chocolate sandwich cookies you like)
- 1 cup creamy peanut butter
- 1/2 cup unsalted butter, softened
- 1 cup confectioners’ sugar
- 1 cup chocolate chips (dark, milk, or a mix)
- A sprinkle of sea salt (optional but highly recommended!)
Tools:
- A food processor or a resealable bag and rolling pin
- Mixing bowl
- 9×9-inch baking pan
- Parchment paper (for easy removal)
Gather everything up, and you’ll already feel like a pro in the kitchen.
Crush the Oreos
Next up, it’s time for some fun! Crushing the Oreos is not only what brings flavor; it’s also quite therapeutic. You can either:
- Use a food processor: Simply pulse the Oreos until finely ground.
- Go old-school: Place the Oreos in a resealable bag and crush them with a rolling pin until you achieve a fine crumb.
Feeling a little adventurous? You could even leave some bits chunky for texture. This Oreo crumb will be the base of your delicious creation.
Mix the creamy peanut butter and butter
In a large mixing bowl, combine your creamy peanut butter and softened butter. Using a hand mixer or a spatula, beat the two ingredients together until they form a smooth and creamy combination. This mixture is where the magic happens, adding richness and creaminess to your bars. Once mixed, gently fold in the confectioners’ sugar until fully integrated. Don’t worry if it’s a bit thick; you want it to be spreadable but still have a lovely texture.
Combine the Oreo crumbs with the peanut butter mixture
Now comes the exciting part! Mix the crushed Oreos into your creamy peanut butter mixture using a spatula. This is where you can really get in there and make sure every crumb is coated with that delicious peanut butter blend. The combination of flavors here is heavenly, and you may be tempted to sneak a taste – and who could blame you?
Press the mixture into the pan
Line your baking pan with parchment paper for easy removal later. Transfer the Oreo and peanut butter mixture into your prepared pan, spreading it evenly. Use your hands (damp if you prefer) or the back of a spatula to press down firmly. You want a compact layer, which ensures every bite is packed with flavor.
Melt the chocolate and pour over the base
While the peanut butter base is setting, it’s time to melt your chocolate chips. You can do this either in a microwave (30 seconds at a time, stirring in between) or over a double boiler. Once melted and smooth, pour this over the peanut butter and Oreo layer in your pan. Spread it evenly with a spatula and, if you’re feeling fancy, sprinkle a bit of sea salt on top to enhance the flavors.
Chill until set
Now comes the hardest part: waiting! Cover the pan and refrigerate for at least 2 hours, or until the chocolate has set firmly. I know it’s tough, but it’s worth every minute. Once they’re set, you can lift them out using the parchment paper and cut them into squares or bars.
And just like that, you’ve made your very own Oreo Peanut Butter Bars! Store any leftovers (if there are any!) in an airtight container in the fridge for up to a week. Enjoy this delightful treat at any occasion – or just because. Trust me, you’ll have everyone asking for the recipe!
Variations on Oreo Peanut Butter Bars
Add-Ins to Elevate Your Oreo Peanut Butter Bars
One of the best parts about baking at home is the freedom to customize your treats. When it comes to Oreo Peanut Butter Bars, you can play with various add-ins to match your flavor preferences. Consider throwing in some nuts for added crunch—walnuts or pecans work beautifully. If you’re a chocolate lover, a handful of chocolate chips can take your bars to the next level, providing that delightful gooeyness with every bite.
- Nuts: Almonds, walnuts, or even hazelnuts for extra crunch.
- Chocolate Chips: Semi-sweet or dark chips can intensify those chocolatey vibes.
- Dried Fruit: For a surprising twist, add in some raisins or dried cranberries.
Beyond just taste, incorporating these add-ins can also introduce different nutritional benefits, like healthy fats and fibers.
Gluten-Free Options for Anyone
You might be wondering, “Can I enjoy Oreo Peanut Butter Bars if I’m gluten intolerant?” Absolutely! There are several simple swaps to make this recipe gluten-free. Instead of regular Oreos, try using gluten-free Oreo alternatives that are readily available in most stores.
Additionally, make sure to choose gluten-free oat flour or gluten-free all-purpose flour as your base. Not only does this keep the bars safe for those with dietary restrictions, but you might find that the texture is just as delightful.
For more tips on gluten-free baking, check out resources from the Gluten Intolerance Group or the Celiac Disease Foundation.
Getting creative with your Oreo Peanut Butter Bars is half the fun! Which variation are you most excited to try?
Cooking tips for Oreo Peanut Butter Bars
Tips for achieving the perfect texture
When crafting your Oreo Peanut Butter Bars, the texture is key to making them truly unforgettable. Here’s how to get it just right:
- Use room temperature ingredients: This helps in achieving a smoother, creamier filling. Let your peanut butter and butter sit out for about 30 minutes before mixing.
- Don’t over-mix: When combining your ingredients, mix just until combined. Over-mixing can lead to a denser texture, which isn’t what we want for those luscious bars!
- Chill properly: After your bars are assembled, let them chill in the fridge for at least two hours. This time helps them set perfectly, making cutting much easier.
Storing leftovers: best practices
We all know how tempting these Oreo Peanut Butter Bars can be, but if you find yourself with leftovers, storing them correctly is essential:
- Airtight containers: Place your bars in an airtight container to keep them fresh. This keeps them from drying out and protects from any fridge odors.
- Refrigeration: Store your bars in the fridge for optimal freshness. They can last up to a week, but good luck making them last that long!
- Freezing for later: If you want to enjoy them later, wrap individual pieces in plastic wrap before placing them in a freezer-safe container. They can be stored for up to three months!
For more tips on storing baked goods, check out this resource on food preservation.
With these tips, your Oreo Peanut Butter Bars will not only taste amazing, but they’ll also maintain their scrumptious texture and flavor! Happy cooking!
Serving suggestions for Oreo Peanut Butter Bars
Pairing with Milk or Coffee
When indulging in your Oreo Peanut Butter Bars, consider pairing them with a glass of cold milk or a freshly brewed cup of coffee. The creamy texture of milk perfectly balances the rich flavors of the bars, enhancing that delightful peanut butter and Oreo combo. If you prefer coffee, a smooth, medium roast coffee can bring out the chocolatey notes even more. What a delightful contrast of tastes!
Presentation Ideas for Gatherings
If you’re planning a gathering or just want to impress your friends, think about creative ways to present your Oreo Peanut Butter Bars. Try cutting them into bite-sized squares and serving them on a vibrant platter. Adding a sprinkle of crushed Oreos on top can elevate the presentation, making them even more tempting. You could also pair them with accompaniments like fresh fruit or a scoop of vanilla ice cream for a visually appealing dessert table. Personalized touches, like little name tags for each treat, can make your gathering feel extra special.
For further inspiration on presentation, check out resources from The Kitchn and Serious Eats.
Time breakdown for Oreo Peanut Butter Bars
Preparation time
Making your Oreo Peanut Butter Bars is easier than you might think! Start with just 15 minutes of prep time. Gather your ingredients—think crushed Oreos, creamy peanut butter, and a touch of melted butter. It’s a quick and enjoyable task that sets the stage for deliciousness.
Chilling time
Now, the hardest part: waiting! You’ll need to allow your bars to chill for about 3 hours in the fridge. This step is crucial as it helps everything set perfectly, ensuring that delightful contrast between the creamy filling and the crunchy base.
Total time
In total, you’re looking at 3 hours and 15 minutes before you can dive into your freshly made Oreo Peanut Butter Bars. Perfect for a weekend treat or to impress friends at your next gathering.
Looking for more fun ideas? Check out this guide on no-bake desserts for some inspiration!
Nutritional facts for Oreo Peanut Butter Bars
Understanding the nutritional profile of your favorite treats can help you enjoy them guilt-free! Here’s a breakdown of what to expect from these delicious Oreo Peanut Butter Bars.
Calories
Each serving of Oreo Peanut Butter Bars packs approximately 250 calories. While they’re a decadent treat, keeping an eye on portion sizes makes indulgence manageable.
Protein
You’ll find about 5 grams of protein per serving. This comes from the peanut butter base, making it a tasty way to add a little protein boost to your dessert routine.
Sugar Content
With roughly 20 grams of sugar per bar, these treats definitely lean towards the sweeter side. Consider balancing them with a protein-rich snack earlier in the day to keep your sugar levels in check.
For more information on nutritional balance, you might find resources from Healthline helpful. Adding Oreo Peanut Butter Bars to an otherwise nutritious diet can be a fun way to satisfy your sweet tooth!
FAQs about Oreo Peanut Butter Bars
Can I use a different type of cookie?
Absolutely! While Oreo Peanut Butter Bars are traditionally made with Oreos, feel free to experiment with other cookies. Gingersnaps or vanilla wafers can add unique flavors to your bars. If you’re looking for a gluten-free option, try using gluten-free cookies or even peanut butter cookies. Your creative touch might just lead to a new favorite!
How long do they last in the fridge?
Properly stored in an airtight container, your delicious Oreo Peanut Butter Bars can last about a week in the fridge. For longer storage, consider freezing them! Just wrap each bar tightly in plastic wrap, then place them in a freezer-safe bag. When you’re ready to enjoy them again, let them thaw in the fridge overnight.
Is it possible to make them vegan?
Yes, making these bars vegan is totally doable! Swap the regular Oreos for a vegan-friendly option (most Oreos are already vegan, but double-check the labels). Use vegan butter or coconut oil instead of regular butter in the recipe, and choose nut butter with no added dairy. By making these simple substitutions, you can enjoy a delicious plant-based treat without sacrificing flavor.
If you’re curious about more baking tips, the folks at The Vegan Society have some fantastic resources. Plus, they provide a variety of vegan recipes that you might find inspiring for your culinary adventures!
These questions are common among first-time bakers but don’t hesitate to reach out if you have more! Your journey to mastering Oreo Peanut Butter Bars can be just as rewarding as the delicious outcomes. Happy baking!
Conclusion on Oreo Peanut Butter Bars
Why these bars are a must-try for homemade dessert lovers
If you’re on a quest for a dessert that marries sweetness with a hint of saltiness, look no further than Oreo Peanut Butter Bars. These delicious treats are not just a feast for the eyes but also a delight for your taste buds, making them perfect for any occasion. The combination of creamy peanut butter and crunchy Oreo cookies creates a rich texture that’s hard to resist.
- Easy to Make: You don’t need to be a baking pro to whip up these bars. They’re straightforward and require minimal effort.
- Great for Sharing: Host a gathering? These bars are a hit, delightful enough to impress guests, yet easy to prepare.
So, why wait? Grab some ingredients and treat yourself to a well-deserved sweet escape! For more delectable dessert ideas, check out The Kitchn’s Dessert Recipes.
PrintOreo Peanut Butter Bars: The Indulgent Treat You’ll Love
A delicious and indulgent dessert that combines the rich flavors of Oreo and peanut butter, perfect for any sweet tooth!
- Prep Time: 15 minutes
- Cook Time: 20 minutes
- Total Time: 35 minutes
- Yield: 12 bars 1x
- Category: Dessert
- Method: Baking
- Cuisine: American
- Diet: Vegetarian
Ingredients
- 1 cup Oreo cookie crumbs
- 1/2 cup unsalted butter, melted
- 1 cup creamy peanut butter
- 1 cup powdered sugar
- 1/2 cup chocolate chips
Instructions
- Preheat your oven to 350°F (175°C).
- In a bowl, combine the Oreo cookie crumbs and melted butter until well mixed.
- Press the mixture into the bottom of a greased baking pan.
- In another bowl, mix the peanut butter and powdered sugar until smooth, then spread over the crust.
- Sprinkle chocolate chips on top and bake for about 15-20 minutes.
- Let it cool, cut into bars, and enjoy.
Notes
- For extra flavor, consider adding chopped nuts or drizzling more chocolate on top.
Nutrition
- Serving Size: 1 bar
- Calories: 200
- Sugar: 15g
- Sodium: 150mg
- Fat: 10g
- Saturated Fat: 4g
- Unsaturated Fat: 5g
- Trans Fat: 0g
- Carbohydrates: 25g
- Fiber: 1g
- Protein: 5g
- Cholesterol: 15mg
Keywords: Oreo, Peanut Butter, Bars, Dessert